Something New For You from Rowena List of Getting It Together: Home Renovations

Despite everything that is going on in the province of British Columbia and the world, I hope that each of you had an opportunity to enjoy your summer. And I trust that you are all safe.

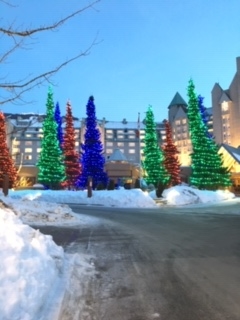
I had the pleasure of being in Italy and Croatia before the heat dome. It was a fantastic trip. I’ve included a few photos.


Feel free to reach out to hear more.


For those of you that follow me on social media, you will have noticed an additional department to my company. We are now doing home renovations. It’s a very natural fit. As we are downsizing and clearing the clutter, it makes room for better systems, and an updated look to your current space.

Before:

After:

Before:

After:

I’ve teamed up with a professional contracting company. I assist with the design and functionality to maximize your space. Once the renovation is complete, I work with you to put your space back in order. It’s a whole lot of fun. I’ve included a couple of photos of our most recent jobs. To see more, please follow me on social media.

https://www.facebook.com/rowenalist

If you have any questions, or would like a quote, please reach out.
www.gettingittogether.ca

By |2023-09-27T19:45:44+00:00September 26th, 2023|Home Organization, Home Renovations, Organization Tips|0 Comments

What To Do With Your Burnt Out Christmas Lights

Check out this short video on What To Do With Your Burnt Out Christmas Lights and then read on for fabulous tips from Product Care.

Burnt out Christmas lights? Recycle them!

At this time of year, British Columbians are unboxing their Christmas decorations, including lights. We all know thatIMG_4802 annoying feeling when you plug in the string lights and the bulbs are no longer working. Many people don’t know what to do with that pesky string once it’s reached the end of its useful life. Thankfully, they can be recycled.

Highlights

In addition to string lights, our program accepts all kinds of lighting products from fixtures (think chandeliers, desk lamps, etc.) to burnt out light bulbs including fluorescent tubes, halogen bulbs, CFL’s, LEDs, and more.

Check out Product Care’s full list of accepted products and find a location near you that accepts them online. Recycling your Christmas lights gives their parts a new life, rather than adding to our landfills. After lights are dropped off at a collection site, they’re transported to authorized recyclers for processing – right here in Canada. Machines are used to break down the products into component parts (e.g. precious metal, glass, plastic) and harvest the materials that went into the products in the first place.

Thank You to Kristina Charania
Marketing & Design Coordinator
productcare.org

P.S. Give yourself or someone you love with the gift of a clutter-free 2020 and contact us today for a free over the phone consultation.
www.gettingittogether.ca

By |2020-06-07T20:52:31+00:00December 10th, 2019|Home Organization, Organizer|2 Comments

How To Spring Clean And Spring Clear

Do you have the Need To Clean and the URGE TO PURGE?

Spring time brings this out in all of us. The rain has stopped…hopefully and the birds are singing. For those of you reading this outside of Vancouver you might be blessed to have sun all year and happy birds singing daily. We in Vancouver get excited about this.

Spring is a time of newness and fresh air. I think that is why so many of us have the urge to purge and start cleaning. The best time to start your Spring clearing and cleaning is when you stop using the heat in your home.

Check out this short video on “How To Spring Clean And Spring Clear” then read on for Getting It Togethers’ top tips to help you get on your way.

Tip #1 Make a list of all the things you would like to accomplish in your Spring clearing and cleaning. You will want to break the list down as this project is not done in a day.

For example:IMG_3391

  1. Wash and store all Winter clothing and replace with your Spring and Summer wardrobe. Keep in mind that if you have not worn it for a year or it does not fit then it is time to pass it on.

    While your closet is empty give it a good vacuum and dust down the inside walls. Spray the carpet with a freshener of your choice. I like using essential oils for a chemical free environment. Did you know Lavender oil helps to keep moths away?

  1. Put away all seasonal sporting equipment. Be sure to give them a good clean before you do. Add a clean dry wash cloth with a few drops of Lavender oil on it to the clear plastic bin before storing.

  2. Wash curtains, blankets, bedding etc. Pick a sunny day so you can hang them on the clothesline if you have one. You will enjoy that nice Spring clean smell.

  3. Go through all the piles of papers, magazines, articles etc that you were saving for a rainy day (let’s hope they are gone for a while). Deal with each item of paper once. Donate old magazines to your local gym or doctors’ office. Recycle all outdated reading material. Shred old bills etc. or better yet get yourself set up for paperless.

Tip #2 Get your family involved. It is no fun doing this alone and chances are it’s not all your stuff.IMG_2918

For example:

  1. Spend a day in the garden together clearing out all the debris from Winter and cleaning all the cement walks and driveway. Borrow a power washer from a friend or neighbour (the kids will have fun with this one).

  2. Get small children to go on their hands and knees and dust all the floor boards and behind hard to reach furniture. Don’t forget to get them involved in their own rooms too. They can clear out old toys and clothes to make room for the new season.

    Reward them with a treat or special activity at the end of the day.

  3. Make a “honey do” pot. Write out all the chores you would like your husband/partner to do. Write one chore per piece of paper and place them in the pot. Every Saturday morning, he gets to pick one job out of the jar. Reward him at the end of the day too!  If you do not have a husband or he is not the “handy man” type then make a list for the local handy man in your area. Some areas have “husbands for hire” companies. And yes, there are a lot of things we as women can do ourselves.

Tip #3 Turn on your favorite music, open the windows and take it step-by-step. Stay focused and don’t get distracted by those photo albums! Doing this all before summer means you don’t have to think about it during the best part of the year.

Tip #4 The best tip of all is “an organized home takes 40% less time to clean”. What will you do with all your spare time?

If you just can’t fathom tackling your urge to purge alone, contact www.gettingittogether.ca for Spring Clearing help.

By |2020-06-07T20:52:32+00:00March 20th, 2018|Home Organization|0 Comments

Downsizing Your Memorabilia

Are you a sentimental kind of person?

Have you saved everything and I mean everything from your children’s past?

Would you like to get a handle on your memorabilia?

Check out this short video for some very quick simple tips on downsizing your memorabilia.

and if you like it please click the” like” button and then pass it on to your friends and family.

Then read on for Getting It Together’s Top 3 Tips on downsizing your memorabilia.

We all go through different stages in our lives. At one point you may have kept everything that had any sentimental value to you. Then as time moves on you may have thought that some of this “stuff” was holding you back. Or maybe like me you were forced to downsize and decided that you were not going to move all of your memorabilia with you yet again.

1How many of us really even have the extra time to go through our memorabilia boxes? The only time I ever have is when I was getting ready to move.

Oh ya, I hear you. You are waiting until you retire or until you are in a senior’s home and then you will go through it all. I have yet to meet a senior who has any more time now then when they were working full time. Funny how that works isn’t it. Well that is because activities fill the time we allot them. You have 5 minutes to tidy up your kitchen before guests arrive and you can get it done. If you have all day you might procrastinate a little. This is human nature.

Tip: 1 Have one medium size rubber container per person in your household. That is the limit of stuff you will save for them or for yourself. If the container gets full then it is time to go through it and pull out some less important items. You will see as time goes on how certain items do lose their priority.

Tip: 2 Ask yourself the purpose of keeping each item. Is it sentimental? Is it from a family member who really wanted you to have a certain item? Is it from a vacation? If you do not have a concrete purpose of keeping the item then it is time to ask yourself why. Why am I keeping it?

Tip: 3 Keep your memorabilia box up high on a shelf. You do not want it to get water damage if you happen to have a flood in your basement of crawl space.

How about you? Where do you stand on the sentimental stage? Love to hear from you in the comment box below.

Enjoy your precious memorabilia items. I sure do.

PS: Did you know I offer over the phone coaching services? If you would like to live more on purpose and passion or would like a better handle on setting boundaries then please contact me for a FREE 30 minute discovery session.

Go to www.reclaimsession.com to book your session now.

What To Do With Your Greeting Cards – Do You Toss, Keep, Store Or Dispose Of Them?

Several of the homes I am working in right now seem to have an over abundance of greeting cards. These are cards the family members have received over the years. One of the questions I get asked frequently is “should I keep these cards? I will get to that in a minute. In the mean time I find it interesting that most of these greeting cards are in an old box, they are bent and sometimes still in the envelope….unopened! Boxes of cards can get very dusty and musty smelling too.

Do you have boxes of greeting cards that you have received?

What is your purpose of keeping them?

Read on to get the TOP 5 Getting It Together’s TIPs on What to do with your greeting cards.

Tip#1 Decide if you are an Ecard person or a paper card person. Pick one method and stick to it. Some people are NO card people. Maybe as a family they have decided to not send any cards. (You might decide to put the money you would spend on cards and donate it to a charity of your choice) Then there is the “send out card” company. They do all the work for you once you have given them all your details.

Tip#2: Purpose. What is the purpose of keeping a card? If you give someone a card do you expect them to keep it FOREVER? Probably not. Just like if someone gives you a card they do not expect you to keep it forever. I heard of a lady who kept every card she had ever received. Her thought was that she would re-read them all one day when she was in an “old folks” home. She thought she would like to remember all the kind things people had said to her. I visit an extended care home once a week and I hate to say it but there is no room in those places for a lifetime supply of greeting cards.

Tip#3: Keep the very special ones. So you decide that yes indeed you would like to keep the very special cards. After each Birthday, Anniversary, festive holiday season sit down with a cup of tea.

Look over all your cards and select your 2-3 most precious ones. I put one or 2 of my most special greeting cards in random places in my www.1t031.com binder. That way when I open a page I get a warm fuzzy feeling from the person who sent me the card.

Tip#4: Store them properly. Once you have narrowed down your cards, store them in a plastic shoe box. Many hardware stores carry these boxes at a very reasonable price. Our local store just had them on for .67cents (Canadian) each. It would be fair to have one box per person in the household.

Tip#5: Recycle, repurpose. Please be sure to recycle all greeting cards you are not keeping or repurpose them. One way is to turn your old greeting cards into gift tags. Cut out part of the pretty picture, punch a hole in the upper corner and put a ribbon through it. Check in with your local school or senior centre’s to see if they would like cards for craft projects. I knew one lady who could take a greeting card and turn it into a box. She then put small candies or a piece of jewelry in it and gave them away.

Love to hear from you. What do you do with your greeting cards? Please leave a comment in the box below.

2

PS: This picture is of the system I use to store new greeting cards. This box has dividers in it for all of the special occasions. Once I buy my cards I simply file them under the appropriate occasion. I also use my perpetual calendar that is part of my 1to31 Organizing System. This helps me keep track of all my friends and families Birthdays, anniversaries and special occasions. Check it out www.1to31.com

By |2020-06-07T20:52:36+00:00August 11th, 2015|Home Organization, Organizer, Organizing to Move|0 Comments

Organizing your make-up: Find what you are looking for in 20 seconds or less

R applying Makeup-5
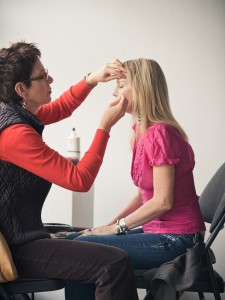
Most of you know I come from a cosmetic background. With well over 3 decades in the business I thought it was time to share a few of my trade secrets. Like most of us, putting on our make-up is a habit. One day rolls into the next and before long we realize we have not cleared out or organized our make-up for some time. This is not a good thing.

Here are a few of my top tips for organizing your make-up. You’ll be able to find what you are looking for in 20 seconds or less and be up to date.

Tip#1 Pump bottles. Whenever possible use cleansers, moisturizers and foundations that come in pump bottles. This saves time. No more opening the containers morning and night. Simply pump out what you need. It is also more sanitary as your fingers are not touching the open caps.

Tip#2 Brushes. One good set of brushes is all a gal needs. My favorite is the MaryKay brush set because it comes in a nice roll –up container. This is especially handy when traveling. Good brush sets will last many years. Wash them once a month in a little shampoo and conditioner. Allow to dry overnight. Toss out all old, used sponge tip applicators and broken brushes.

Tip#3 Colour cosmetics. This includes eye shadows, liners, lipsticks and blush. Dump out your cosmetic bag, drawer or basket. Know your limit. How many items do you really want and need? It is safe to say that 3-4 eye colours will cover your basic needs. Toss the ones you never use and ALL purchasing mistakes. Come on, we all have one or two of those in our bag. The shimmery gold eye colour that you thought you HAD to have. Toss ALL lipsticks you are no longer wearing. The ones with just a little left in the tube, the FREE ones that are not your colour and the outdated ones. Keep your favorite 3-4. Do the same with your liners and blush. The thing is we wear 20% of our make-up 80% of the time.

Tip#4 Storage. Pick one place to store your make-up. Do you like to keep it all in a cosmetic bag, a basket or a drawer? The more places you have to store cosmetics the more likely you will spread to those areas. This is not a good thing. I keep all my items in one small drawer in the bathroom. I also like to have a travel cosmetic bag ready to go at all times. I put all my “almost finished” eye colours, blush and liners in there.

Tip#5 Toss. How many bottles of half used creams, lotions and potions do you have? Do you go onto the new before using up the old? People have the best of intentions of using up those partially used bottles. They don’t. Do yourself an organizing favour and toss them out. OR promise me you will use them up before buying new.

Do you have lots of unopened make-up items, cosmetics or toiletries? Please donate them to your local women’s shelter. They would be happy to receive them.

Keep your “look” up to date with regular consultations. Many cosmetic counters offer this service. So do home based cosmetic companies. Find a consultant who knows your style and one that you trust.

I love organizing cosmetic drawers, bags or baskets. Be sure to contact for a FREE 30 minute phone consultation. We will discuss your make-up needs; your storage concerns and solutions. I’ll even give you the latest make-up trends.

By |2020-06-07T20:52:39+00:00January 26th, 2015|Organizer|0 Comments

How To Organize Kids Artwork – what to keep and how to store the rest

Kids artwork
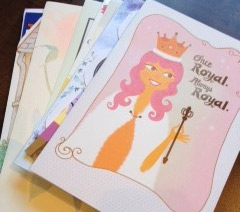
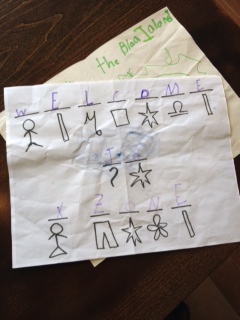
Do you have the next up and coming Picasso?

Do you wish you could keep every piece of artwork your kids bring home?

Do you keep all the art thinking that your kids will want it when they are grown up?

Human nature is such that we all think pretty much the same on this topic. We feel that every piece of artwork is the BEST piece. We feel that we want to keep all the kids artwork because it would hurt their feelings if they saw it in the recycle bin. We also think they will want it when they are grown up … is this so they can show their own kids? Do you have your artwork from your childhood? What are you doing with it? How many times have you moved it? Is it filled with dust and must?

I do not know about you, but I do not have one piece of artwork from my childhood. I am perfectly okay with that as I see other children’s artwork and know that mine would have looked almost identical. Plus, what would I do with 10 plus year old artwork? I really do not feel any less than by not having my artwork.

I do have a vivid memory of a piece of artwork that I did that won me $5.00. It was of a dragon. It was big and bright and colourful. The memory is all I need.

Take a quick moment to watch this video on How to Organize Kids Artwork:


Then give these simple 5 tips a try on how to organize your kid’s artwork.

Tip#1: Designate one wall or hallway for your kid’s artwork. Hang a long piece of string on that wall that looks like a clothes line but attached to the wall. Hang clothes pins from the string.

Tip#2: Each time your child brings home a piece of artwork hang it from the “clothesline”.

Tip#3: At the end of each week take a photo of your child standing beside his/her artwork. These pictures make really cool screensaver slideshows or a Pinterest board!

Tip#4: At the end of each week take all the art down off the string. Along with your child (or not) decide on ONE piece of art from that week that you will keep. The rest can be recycled, used as wrapping paper for the next Birthday party, made into greeting cards for family and friends, or turned into party invitations. You can even send the artwork off to grandparents or aunts and uncles.

Tip#5: At the end of each month you will have 4 pieces of your children’s finest Picasso. Along with them or by yourself select ONE of your favorite to store in a keepsake box. The other 3 get tossed, or repurposed as mentioned in tip #4. At the end of the year you will have 12 pieces of art. Now it is time to get ruthless again and select ONE piece that will be saved in your child’s memorabilia box or you may choose to frame this one piece or you may choose to put it in a bound book. You can also add the weekly photos that you took to this book or scrapbook. I have seen really cool bound books of kid’s artwork. If you are interested in this please contact me and I will give you the contact information.

I would love to see your children’s artwork. Please send me a picture or two. Also, I would love to hear your comments. Please fill in the box below with your great ideas on organizing your kid’s artwork or any questions you might have.

Have you set up a Pinterest account? If not please feel free to contact me. I’ll give you the highs and lows in a FREE 30 minute phone consultation. We will discuss whether you need a Pinterest account. What you can pin and why you might like to have a Pinterest account.

By |2020-06-07T20:52:40+00:00December 15th, 2014|Home Organization, Organizer|2 Comments

Downsizing Seniors

Downsizing SeniorsAre you the adult child of an aging senior?

Are your parents still in the family home? Is it time to downsize them?

Are you a senior wanting to downsize?

Seniors are our largest growing demographic. You may be one of them or you may have parents that fit into that category.

My mom is 79. Fortunately she is still able to live in the family home however that does not mean that is the best idea. Some experts have the theory that it is better to downsize while you can still make all of the major decisions and your health is still really good. I would have to agree.

All too often I work with clients who are not capable of downsizing. Their grown children are so busy with their own lives that they are not able to help either.

Check out this short video on downsizing seniors. Plus Getting it Together’s game plan.

1. Have a family meeting to decide when a good time to start downsizing is. My Aunt did this and came up with the age in which she felt was appropriate to move into something smaller. She has given herself a couple of years in which to plan for and execute the move. In the meantime when her grown children are over they work on a certain area of the house. For example, they did cookbooks the other day. This was a funny one because my cousin asked my Aunt which cookbooks she was still using to which my Aunt replied “none, I do not cook anymore”. Lol

Ok so that was easy. All the cookbooks went to the second hand book store.

Next in line were the volumes of encyclopedias. The money people have spent on encyclopedias to realize that now a day’s Google does it all for us. Off to the used book store they went.

2. Decide who will help you or your aging parents with downsizing. Chances are your grown kids have a young family of their own. Their time may be very limited. Is it best to hire a professional organizer to help with the downsizing?

3. Where do you want your items to go? This is always a tricky question. I know of people that again have a family meeting. They get each person to put their name on the back of any items they would like once the downsizing starts and/or when the aging parents pass away. Are there collections that need to be sold? Are there family heirlooms that need to be preserved? Are there other household items that need to be donated or tossed? This is where I come in. I will sell, donate, or toss items for my clients. I think if people know their items are going to a good place they are more likely to part with them.

What items will be needed in the new smaller living space? This might be a tougher question to answer until you see the new smaller living space. Once you do, you will be able to decide what stays and what goes.

4. When should you start downsizing? TODAY! If you have allowed yourself enough time you can break this downsizing project down into bite size pieces. Try not to leave this project to the last minute. Change is hard on most people. Downsizing is one of the biggest changes a person might do in their life. Embrace it.

Would you like a FREE session over the phone? Contact me today to get yours. We can discuss your downsizing situation and come up with some solutions in order for you to move forward right away.

Have you had any experience with downsizing a parent or have you yourself recently downsized? If so please leave some helpful comments in the box below.


How To Slow Down And Savour Your Food

How often do you stand in the kitchen and eat your meals?

How often do you miss a meal? “I’m too busy to eat.”

How often do you get indigestion?

This is all crazy making. The fact that we are too busy, too rushed or maybe to disorganized to eat properly is crazy. Eating is one of the most important things we can do for our bodies next to proper sleep and shelter. Yes it takes time, planning and preparation in order to be prepared for meal time. These ideas take just a little time and a little organization. Your body is worth it. Isn’t it?

Check out this short video on how to slow down and savor your food.

Next time you are getting ready for a meal please try these top Getting it Together’s 5 tips.

Tip#1 Stop. For just a moment and really appreciate what is on your plate. Be grateful for what you are about to eat. (Hopefully it is something really healthy and yummy.)

Tip#2 Breathe. Take a moment and really examine your breath. Are you breathing short shallow breaths or are they long deep ones. If they are short, take a minute and do 3-5 really deep breaths. This will help you to slow down and enjoy your meal.

Tip#3 Chew. Chewing slowly encourages proper digestion. Chewing slowly allows you to really savour the flavours of the food you are eating. If you are a dinner guest chewing slowly shows your host or hostess that you are appreciating the tastes and effort it took them to make the meal.

Tip#4 Sit. Even if you are dinning alone sitting at the table is so very important.

You are important so set a place for yourself. No more eating in the car, eating on the run, eating standing up or worse yet eating in front of the TV. The experts say that sitting down to meals increases your chances of losing weight. (If indeed you need/want to lose weight.)

Tip#5 Set the stage. Get yourself a nice placemat, light the candles, turn on some nice music. Turn OFF the TV. And above all please do not answer the phone unless you are expecting an emergency call.

So often I will call a home and the person claims on the other end of the phone that they are right in the middle of dinner. I have never understood why people answer their phones when they cannot talk. (That is a whole different article). I was in a home the other day and they have a big sign on the fridge: “No phones one hour prior to dinner or during.” What I love about this message is that it was written by the young daughter. Do you think she might have been frustrated by the lack of communication at her family dinner table?

Whether you are dinning with yourself or your whole family these tips are a great way to slow down, connect, savour and enjoy your food and meals.

Give these TIPS a try and let me know some of your most favourite dinning experiences.

By |2020-06-07T20:52:40+00:00September 1st, 2014|Uncategorized|0 Comments

Organizing Family Photos

Organizing family photos does not have to be an arduous task as long as you ask yourself these key questions.

What is your ultimate goal with organizing family photos?

Who would like to inherit all your family photos?

Would you like a family photo album for each family member or just one communal album?

Have you asked your family members if they would like a family photo album or is this something that you think they would like?

Do you make a hard copy or do you put each family member’s photos on a disk?

Do you organize your album by event or chronological?

Please ask yourself these questions and get clear on your outcome before starting the project.

The reason why I am getting you to really analyze these questions is because putting together family photo albums can be tricky. The upside is it can also be loads of fun and very rewarding.

I am going to assume you want to put together a family photo album for each family member. I’ll also assume that your pictures are in hard copy format not digital.

Check out this short video on Organizing Family Photos:

Use these top 5 Getting It Together tips to move forward with organizing family photos.

Let’s say you have 2 children. One we will call Tim and the other Sue.

Tip#1: Take a big white envelope and label it TIM. Take another big white envelope and label it SUE.

Tip#2: Take one small pile, small box or one old photo album. Divide the pictures between each big white envelope. Do not worry about anything else at this point. Just the sorting and dividing of prints between the 2 envelopes. If both children are in one picture you could scan it and put the photo in each envelope.

Tip#3: Take each envelope and do a ruthless purge. Toss any photos that are out of focus. Toss any where the eyes are closed or beat red. Toss any photos in which you have no memory of taking it, do not know where it was taken and or do not know who else is in the photos.

Tip#4: Next take your envelope of pictures and sort them by date or by events. For example you could put all birthday pictures together. Then all Christmas pictures together, etc. I find this to be far more effective than trying to do an album by date.

Tip#5: Put together the album. You may choose to write a little story on each page.

Once you have completed the 2 albums watch with delight as your grown children open them and devour the pages. I am sure they will be thrilled.

Still feeling a little overwhelmed by all the photos in your home. Call me for a FREE 30 minute phone consultation. We can discuss your personal needs. I’ll give you some tips and encouragement to help you move forward with this project.

Did this video and article help you with moving forward? If so, please leave a comment in the comment box below and please share the love by sharing this blog post with your family, friends and social media peeps. Thank you. 🙂

By |2020-06-07T20:52:41+00:00June 9th, 2014|Home Organization, Organizer, Time Management|0 Comments

Title

Go to Top